Showing posts with label Portraits. Show all posts

Sunday, April 6, 2014

Studio Portraits Using Black or White Seamless Backgrounds


Dr. Hibret Benjamin is a dentist with a great smile. She was shot here with a single light using a white seamless background. 
When I do my studio headshots for Headshot Days, I try to give people two different looks. One way I do that is by shooting on both a black and a white background.  I also change the light style to give two different looks.

We go to various locations for our open Headshot Days. Corporate Headshot Days locate at company locations where we shoot several employees in a day. I use seamless because it is most portable.  Nine-foot wide rolls allow me to get farther from the background. I use Savage 66-12 for Pure White and 20-12 Black.   I have two separate Background Support Stands for each backdrop so I can roll one up to reveal the other. My favorite is the Westcott that is 10.5 wide or seven feet wide depending on how many crossbars are used.

For the white background, I only use one light. I use the largest source I can for a key light. My preferred is an 86” Extreme Silver PLM Umbrella with diffuser from Paul C Buff.  This is place on a Paul C Buff Einstein E640 flash unit fired with Cybersync wireless triggers. I like the way this light wraps around the subject softly filling in the shadows. It also leaves a beautiful round catch light. For the white shots I usually have the light straight behind me and directly on the subject.
IT expert Joe Markert of FunctionOneIT, was shot on a black seamless background using 3 lights. 
If I need it, will put a diffused light on the white background. But I always want to make sure the background is not blown out and is in the top quadrant of white on the histogram.  If you blow it out, pixilation happens around the hair. This looks extremely unnatural and detracts from the photos. When I process the photos in retouching, I replace the white background with pure white. So any white showing through the hair needs to be as white as possible in the original shot without pixilation.

For the black background, I change the light to make it a little edgier.  I move the key light off axis to one side by a few feet. I add a gridded rim light from behind the subject on the opposite side of the key light. Also, I put a light on the background. I grid this and throw a diffuser on it to make it just bright enough to create a gradient around the subject. This is especially important if they are wearing darker colors or have dark hair. It separates them from the background. When I retouch, I try to even out the black so it goes pretty dark on the edges. Another tip is to get the subject away from the background so that it is somewhat out of focus. Paper backgrounds have natural insistencies that can be attractive if they are out of focus.


People like having two totally different looks after the session. They will post them in different locations depending on whether white or black is more appropriate.
Dorothee Fisher cofounder of NousDecor was shot on a white seamless at Headshot Day in san Francisco. 

Saturday, September 29, 2012

Shocking?

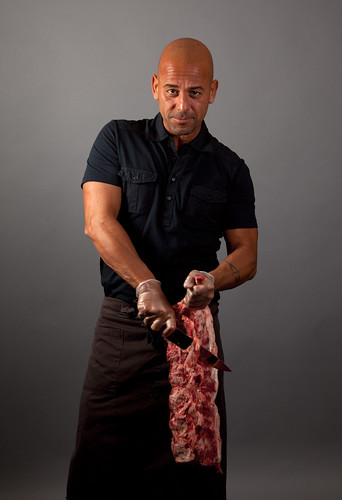
Manny, San Francisco, CA near Union Square, September, 26, 2012.


Nothing really shocks me these days. Perhaps I have been desensitized over the years seeing so much evil and so much grotesque imagery in the press and in entertainment. In trying to create shocking imagery, I decided to avoid the obvious traps of sex and gore. Too easy. Since shocking is so subjective, I don’t think I could have the temerity to claim to have created a shocking image. The first thing I thought of was the cover for the Jane’s Addiction album “Nothing's Shocking”, the two naked siamese twins with their hair on fire. Interesting that since then, their lead singer Perry Farrell has given up trying to be shocking. Joining the mainstream by forming the Lollapalooza festival and endorsing 
Nothings's Shocking, Jane's Addiction

I looked through my David Lachapelle book with its portrayals of Jesus in modern day with gangs and card players, naked porn stars and women deformed by plastic surgery. Somehow, looking back, it all looks rather anodyne and desperate, but I gobbled it up.

I thought about what shocks me. Materialism. Homelessness. Callousness for our fellow man. Lack of connection between humans amidst such a crowded world. I can see all these things at Union Square in San Francisco. Panhandlers in wheel chairs, filthy clothes and hand painted signs beg for help amongst the riches of Neiman Marcus, Gucci and Chanel. I decided to connect with these people. I realized I needed their help to communicate my shock at their plight. So I asked them, “Can you help me?” Not one hesitated to say yes. I told them I was taking photos and would like to hire them to pose for me for $5. They were magnificent in helping, volunteering their information and posing as they were instructed. Shockingly, a connection was made instantly. I hope these photos are shocking in their honesty and the humanness of these people in our midst, so often ignored as we march by with thousands of dollars of merchandise in our bags. 

All these photos were taken near Union Square, San Francisco, CA on September 26, 2012.
Elmo, San Francisco, CAS near Union Square.
Harvey Redd, San Francisco, CAS near Union Square.

Latrice H, San Francisco, CA near Union Square.


Phillip Collins, San Francisco, CA near Union Square.

Silent, San Francisco, CA near Union Square.

Wednesday, June 20, 2012

One Light

Christopher Webster of Hogan's Goat Tavern for indogpatch.com
I seem to be going through a phase where I like shooting with one light. And even then, only when the ambient doesn't give me what I want. I think part of the beauty of it is the simplicity. I do a reading on the ambient, I then set my ISO as low as possible so I can see the surroundings in their own light and still freeze the action, or at least most of it. In the above photo of Christopher Webster for indogpatch.com,  I used a 1/4 sec exposure at f5.6 and 400 ISO. I used an Alien Bees B800 with a gridded soft box placed to camera left. This mirrored the light coming from the door. There is a slight blur when Chris moved to greet a customer (Look at his left hand), but the expression is priceless and the ambient in the bar is just what I wanted.

Hooper Nicole Wong at sunset at Warm Water Cove
Nicole Wong is a Hula Hooper. We wanted a shot of her at sunset and with the hoops in motion. Balancing the light at dusk is always a fun assignment. Here, we used my Alien Bees B800 with a gridded soft box, to the right of the camera. I wanted to freeze the hoops as much as possible, so I used 1/180 for the shutter speed, the fastest that allows me to sync with the flash. There is a little blur on the hoops, which I like. f5.6 gave me the right amount of depth of field. I used ISO 200 to help get there.
Bud Spangler at his Oakland studio. 
This shot for (InMenlo) of jazz producer, Bud Spangler, did not need any ambient. It was a tight space I could light with the single light. In this case I put the Alien Bees B800 with Octabox, right behind me. It gives me a ring-flash type effect, but with softer light. This was shot F8.0 to keep the acoustic material on the walls sharp. 1/90 was the speed and ISO at 100 for detail.

Friday, March 30, 2012

Challenges of a Tight Space

Mary shows off her collection in a very crowded closet.
For my recent shoot with vintage clothes collector, Mary Kuhn, I literally photographed in a closet.  To get the light I wanted was a real challenge. The angle of the door did not allow me to set the light outside. So to make space, I sat on the floor and put a light on a stand above me. Then I held the camera just inches  above her shoes on the floor to get a super low angle.  With my free hand I used a handheld speedlight to light her jewelry. The total space here for Mary, me and the equipment was probably 3 feet x 6 feet. It was a good challenge.

Our second shot was in a tight hallway, I loved the vintage phone hanging on the wall. In this case I put a light outside a glass door that entered the hallway from the side, giving me a nice soft effect. I filled with a speedlight and softbox from the right. Always a sucker for a tattoo, I focused in on that for this shot.

Our final shot was more what I am used to. I used a large Octabox for this shot on the bed. We lined the bed with more of her beautiful dresses and she posed in a vintage play suit. This pose is a bow to the pin ups of the 50s.

Wednesday, January 11, 2012

Cam Damage - Many Shots in Short Shoot


Often when I shoot my tattoo portraits, I am pressed for time. 4 to 5 hours is all we get. A recent shoot with Cam Damage was a good example of how to get many different photos in 5 hours. Cam was flying out from the east coast for the shoot and a few others. She brought an escort. I decided I wanted a combo shoot of environmental and studio.

3 PM - I picked her up and we did our first shot at a bike bridge. This shot was fairly simple. I had scouted it the day before at the same time of day. I had Cam’s escort hold a Lumipro LP160 speedlight with a wireless trigger, just off camera to the right. We did several shots here, but this was my favorite in pose and light. I had a better sky the day before, but you can’t have everything.

4 PM – We arrived at the warehouse where I would set up the studio shots. I always like to start off in the studio or at an indoor location with natural light. I positioned Cam next to the window and shot this with a 85mm lens at f2.0 and ISO 800.

4:45 PM - We set up a white background and shot a couple of nudes. We turned a classic 60s ball chair on its side for this nude. I used an Alien Bees B800 with a 5’ Octobox for the key light. I handheld an LP160 over the camera lens, a la Terry Richardson, for fill and to brighten the ball. I have not posted it here to respect google mature content rules. It can be viewed on my Tumbr blog.

5:40 PM - The shot with the ripped dress, was shot with the same Ocotobox. I added a bare B800 behind Cam on the right. I like the rim light on her arm and jaw and especially in the hair. The yellow background was added in post.

6:30 PM - Next, we pulled out the grey seamless. I love shooting a black dress against the grey background. Having her kneel fills the camera frame, while getting I all her legs and the shoes. This is shot with an Alien Bees Ring Flash on camera. There is the Octobox on the right. It is mostly overpowered but adds some highlight in the hair. The other B800 is behind on the left for hair highlights. There is also a LP160 thrown on the background, which I darkened on the edges in post.

7:10 PM Finally, we added the Saarinen Womb chair. We kept her in the black dress, but I wish I had done another clothing change. Still, I think this is a luscious shot. It is just lit with the Octobox in very close. The falloff is beautiful on her arms and back. We packed up and were out by 8. Cam is an amazing model with a lot of energy and ideas. I can’t wait to work with her again.

Wednesday, December 21, 2011

The Little Black Dress as Technical Exercise

Emily in an American Apparel Dress

I recently shot a whole series of shots with the models appearing in their favorite Little Black Dress, or LBD, as it will be abbreviated here. I also decided to shoot on a black or dark grey background, to simplify the shot and increase the emphasis on the subject. This post, like most on this blog, will discuss the technical challenges of the shoot. For more on the philosophy and concept, read the blog on my website at scottrklinephoto.com/blog.

I always like to light my subjects in studio (and usually outside) with an Octobox for the key light. I place it as close to the subject as possible, usually off to one side, but occasionally right behind me. This provides a soft flattering light on the subject. A circular catch-light is another nice aspect. (See photo below of Karli Henneman for catch light)
Karli Henneman in LBD with Vintage Jewelry
The challenge here, with the dark background is getting a good separation of the black dress from the background. The first thing I tried was creating a slash shaped gradient of light by throwing a strobe on the background then cutting the light in a diagonal shape using flags. (You can see this effect in the first photo of Emily above.) I found this frustrating and inconsistent, every time I got the light balanced on the subject, I has to rebalance the background. Also, unless the studio is huge and the subject is a long distance from the background, light from the Octobox spills onto the background, spoiling the dark effect. This can be mitigated to some degree by flagging the Octobox.

Later, I decided to place a snooted or gridded strobe above the model that points to the background, at waist level. I like the circular gradient I get. It generally flatters by outling the curves of the model. It also tends to be behind the black dress. The darker part of the background tends to be behind the head, arms and legs, giving a nice contrast to all aspects.
Miss Nicole Malice in her own dress
I like to throw a rim light on the opposite side from the Key Light. This is usually done with a grid or bare strobe placed behind the model and just off camera. I center it on the shoulder so that it falls on the hair and the arm as well. Occasionally, I will rim both sides for variety.

Finally, I often use a handheld speedlight, right above the lens for some fill to give the dress a little more detail. Sometime this adds a second smaller catch-light as you can see in the Karli photo.

As for camera settings, I usually shoot around 5.6. This allows me to get most of the subject in focus, and have the background somewhat out-of-focus, minimizing and flaws in the seamless.

I think this set up is very dramatic and flattering. It also has the simplicity that mirrors the dress.
Krysta Kaos in her own LBD and shoes

You can see the entire collection of black dress shots on my flickr page.

Tuesday, August 23, 2011

Fun With Gels


For portraits, the photographer is often presented with a drab or at least colorless backdrop. One way to liven up the shot is by using a gel on a speed light or strobe. It is particularly easy using a speed light. All you need is a little strip of gel taped to the speed light to make it happen.

In the first shot of Model Michelle Cisneros, I posed her in front of a grey roll-up door at a warehouse. I balanced the main lights using an Alien Bees A800 strobe with an Octobox on Michelle’s right. To fill in the shadows and add a catch light I used an Alien Bees Ring Flash on the camera. Finally, I placed a Lumipro LP160 speed light on the ground pointing up at the door. I used a deep blue gel taped over the light. You can see the dramatic effect of the blue as the door appears to glow.
In the second shot of model Kill Joy, I used a very similar approach. The dramatic red light was shined on a concrete wall. I aimed the light a little higher and placed it close to the wall so that the main part of the light was behind her dark skirt. In this photo I used an Alien Bees A800 with a 20% grid for the key light on her face. I wanted big fall-off so that the lower part of her body would be almost a silhouette against the bright red. Finally I used a LP160 handheld just above the lens of the camera to give just enough definition in the shadow.
The final photo gets a little more complicated. When Boo Yao showed up at the shoot, she sported magenta hair and a green dress, those complementary colors begged to be exploited. The shot was in an abandoned munitions depot. I lit Boo with the same Alien Bees A800 with a 20% grid for the key light on her face. I used a 580EXII speed light handheld for fill. The LP160 with magenta gel was placed on a stand to the camera’s right and pointed forward to provide a rim light and light the floor behind the green dress. The second LP160 was given a green gel and point to the back wall so that the green light was behind the magenta hair. The resulting double-decker complementary color combo pops.

Sunday, June 26, 2011

Natural Light Portraits


I am really getting in to Natural light portraits. I will discuss some things I find work well here. But first a little background on how I figured this out.

I have been getting better and better at lighting my portraits. My workflow is as follows:

- Compose the shot and shoot with no added lights. (Natural Light)
- Examine the shot and add a key light or a fill light.
- examine that shot and add a fill light if I added a key previously
- add rim or accent lights (with a grid)

So the shot builds up gradually from no lights to as many as four or five lights. More on this in a future post. What I wanted to talk about here is some of the wonderful shots I have been getting without adding any light at all beyond the natural light.

I like these shots for several reasons. They typically have a very narrow dept-of-field (DoF). This means that only a very small portion of the photo is in focus. As an example, in the photo of Tainted Gypsy above, only her eyes and lips are in focus. This is accomplished by using a wide-open aperture. The best lenses for this have an aperture that can open to f2.0 or better. In this shot I used an 85mm F1.8 Canon lens. This lens retails for around $450 most places. Quite a bit less than the 84mm f1.2 for $2100.

Another great factor is the warm rich colors. Because you are lighting with sunlight, it comes off as a little warmer. All the colors match because all the light is coming from the same source, usually the sun. I like to use indirect light. I place the subject in a shaded area. The light should come from the side ideally. In other words, don’t have your back to a window that the light is coming from. Also, if you are using a window for your source, have it be a window pointing away from the sun, so that the sunlight is not coming directly in the window. In this photo of art gallery owner Joan McLaughlin, the subject is about 8 feet from a huge window that faces south. The shot was in the city, so light was bounced off of buildings across the street.

The lack of glare and harsh light really allows the colors in the photo to be very saturated. In the photo of artist Tim Christiansen, the colors in the paintings that surround him, really pop. Not only does this technique work well for portraits, I found it works best for shooting portfolio shots of art. Here we just opened Tim’s garage door. And all the light came from that.
Sometimes a great effect can be made by using a reflector. This shot of Kristie California has a large white reflector on the right side of the shot. The sunlight was coming from behind and left as you can see on her hair. The reflected sunlight really adds a nice soft highlight on the side opposite the sun. It also creates a huge catch light in the eyes.

One hang up for shooting this way is that you often use very slow shutter speeds. I find it helps push the ISO higher rather than risk the blur of camera shake. Even better is to leave the ISO at 100 or even 50 and use a tripod. Then you get a crystal clear image with minimal pixilation. This shot was at 1/30 sec, f2.0, ISO 100 using the 85mm f1.8 lens.

In my final example, you get the full effect with one added feature, a flattened perspective. In the shot of Miss Rockwell DeVil. the light was coming from behind her. So a very soft light rims her face, elbow and stomach. I used my beastly 70-200mm f2.8 lens set at 90mm, 1/30 sec and ISO 200. I can’t hold this one still at 1/30 so I used the tripod again. The window light was coming from the south. By using the longer lens the DoF is about a foot. Notice the front corner of the couch is out of focus as is her necklace. There were some side windows in the room. They provided some fill light for the shadows and a nice catch light in her eyes. She was closer to the back window, so that light is brighter.

If you want to see these larger and see more examples, I have a set on my Flickr page.

Monday, May 23, 2011

Tattoo Portraits


The tattoo series of portraits has been one of my favorites to execute. Over a period of about 6 weeks, I photographed 16 different subjects. I originally intended to photograph both men and women, but after finding Model Mayhem, a veritable treasure trove of tattooed women who want their photos taken, I decided to focus on women only.

I will focus here on a couple of shots I felt really stood out in the collection. If you would like to see them all, you can see the entire collection on my website at www.scottrklinephoto.com.

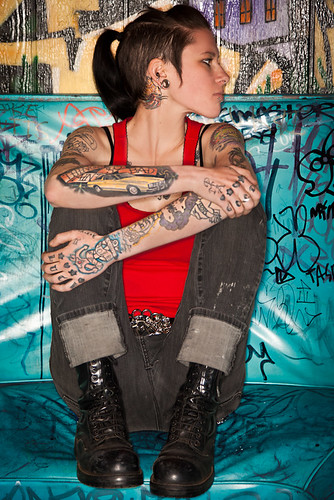
I met Vicci Vice (see photo above) on model mayhem. We met up at her favorite hangout in Oakland, CA. Vicci had some lovely photos on her model mayhem profile, but seeing as this was a portrait, I told her to come as herself. She showed up in some very cool black jeans and a red wife-beater T-shirt. We posed her in a teal Naugahyde booth surrounded by graffiti. This shot featured her gorgeous profile. I used an on-camera 580EXII with a Coco flash ring flash attachment. In the final photo, I pushed the color and made the booth more teal to contrast with the red shirt.
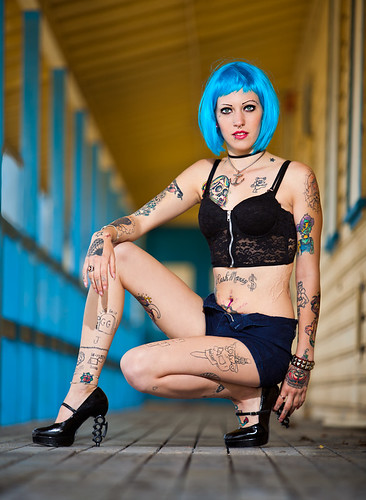
I actually had two sessions with Roxy Rage. In the first I met her and her boyfriend at a carnival in Oakland. There were several colorful backdrops on the sides of the game trailers. With the 5’10” Roxy walking around in her mini skirt and blue wig, we drew a lot of offers of free games and entertainment from the carnival employees. We ended up with this shot on a blue background, which I felt really complermented her hair. Once again I used the Coco flash 580EXII combo.
Our second Roxy shot was at Treasure Island in San Francisco. This shot was on the veranda of an abandoned barracks building. The veranda was raised up. I was able to hang a bare speed light above her, using a super clamp on a pipe. It was my only artificial source of light. I then set my camera on a tripod and got back as far as I could using my 70-200mm zoom lens set to 200mm. I tried to get barely above the level of the floor. Roxy did a great job of contorting to show her great legs and those brass-knuckle pumps, while turning to show her upper body and all that great ink.
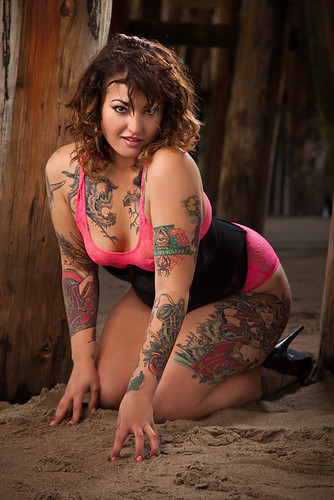
Jayne Doe met me at Santa Cruz boardwalk one Saturday morning. We retreated under the pier where the light was perfect. I added an Alien Bees AB800 light with an Octobox to get this soft light. I also threw a speed light with umbrella from camera right down low to light her legs and another speed light with a mini soft box behind her to put some rim light on her back and hair.

On all these shots, I increase the contrast on the tattoos by using a partially masked high pass filter in Photoshop. Some shots have as many as 12 layers of adjustments.

Monday, May 16, 2011

Clone Self-Portraits


Being the egotist that I am, I always wondered what the world would be like if I could clone myself. I could get a lot more done. Have work, fun, family and fitness all happening simultaneously. Well, I am happy to announce, I have succeeded in cloning myself - at least in a photo. To date, I have done four such photos. The process is straight–forward, if somewhat tedious. The imagination is the biggest limiter.

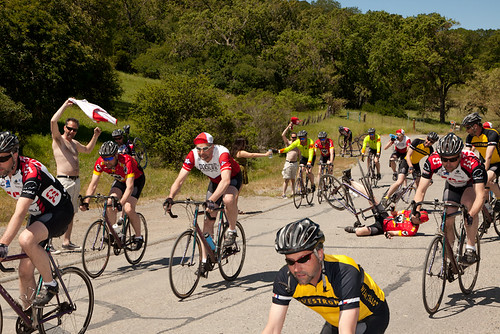
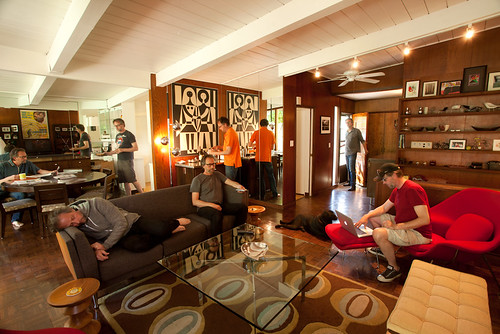
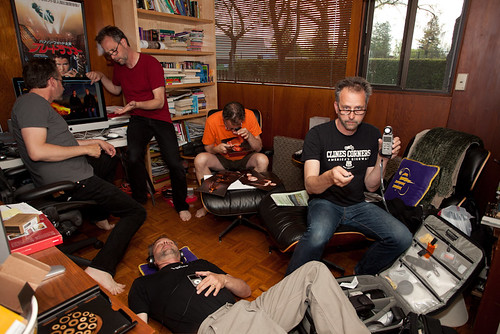
In the first photo (below), I imagined myself at home doing the normal daily chores of life. Things like eating, sleeping, watching TV, etc. To get the shot, I set the camera with a 20mm lens on a tripod in the corner. I exposed for the ambient light at about 4 seconds on a f8 aperture. I used the camera’s 2-second exposure delay and a remote trigger to get in place. So this was actually several full exposures with me in the different places. After all the shots were taken, I opened the first one in Photoshop CS5. For each subsequent shot, I opened the new photo, selected all and copied to the clipboard. Then I went back into the main photo and pasted the image as a new layer. Next I filled the mask with black to hide the new photo. Then I painted the mask with white to reveal only the part that I wanted to add. I did this with each subsequent layer until the entire shot was composed. This one was easier than the bicycle shot at the top because there was no overlap between the layers.

For the bicycle shot, I used a similar technique, except for using a Canon TC80N3 intervalometer. I set this on 15 seconds and did a different loop on my bicycle, making sure to be in a different place each time. The camera was again on a tripod. I used my 580Xii on camera for fill because of the time of day. I changed shirts, glasses and water bottle every 10 shots or so, so I could have a variety of characters in the shot. I intentionally cropped some characters in half to show more motion and imply even more cyclists than were in the shot. The girl handing me the water bottle, just happened to walk by and agreed to help out.

The layering for this shot was much more complicated than the other. There were those pesky see-through wheels with spokes. Lots of images overlapped. So selection of images to mask and reveal was much more complicated. Also, several of the characters ended up being moved from their original position. Namely the tire-changer and the front bottom character in the yellow. It was tricky to position them so that they looked correct. The shadow on the tire-changer had to move as well. I lowered the contrast and lightened the tire-changer to make sure he looked farther away.Finally, I showed a shot of me editing photos in my home office. This would certainly make me more productive if I wasn't arguing with myself. Jerseys in this shot, except for the Livestrong Jersey are by 11-gear, my favorite cycling apparel. You can see more self-portraits on my website at www.scottrklinephoto.com.

Saturday, March 19, 2011

Olivia Dantes at St. Brigid's Church


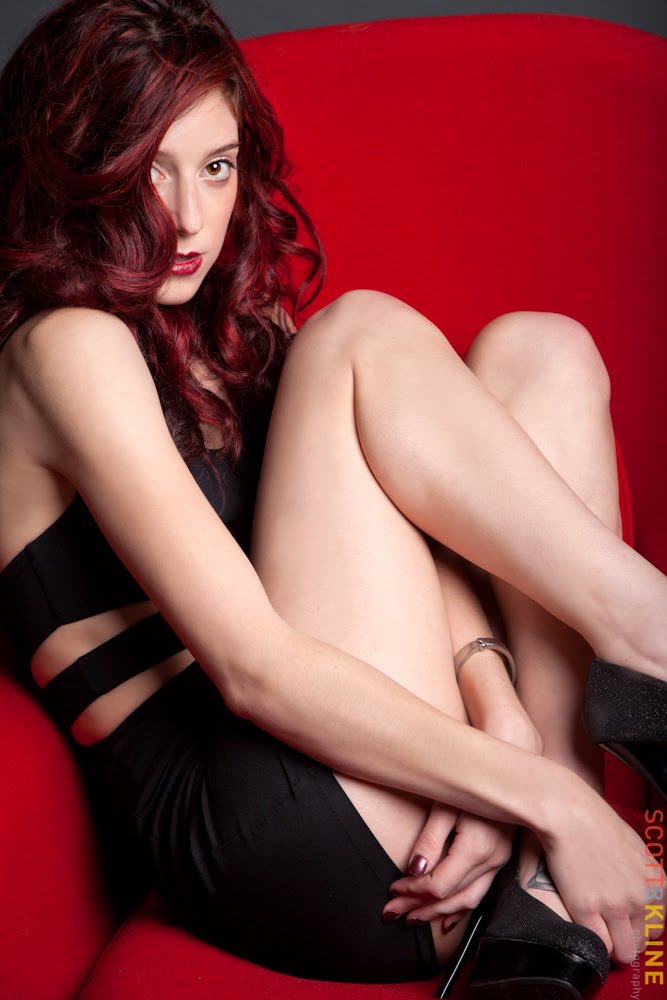
Olivia Dantes sat for me at St. Brigid’s church. Once again I used the Octobox on an Alien Bees AB800. Shot on above also used a grid light on the background. I had great makeup from Monica Bulyard. These fashion shots can be quite fun. The dress in the alter shot is a PVC dress I love the Rembrandt style lighting in the first shot. To get this lighting the Octobox is only about 3' from the subject. Similar to the light in the Lady with Ferret shot previously shown. You can see more from this session at my flickr page.

Wednesday, March 9, 2011

Maggie Runner


We travelled to Long Branch Farms near Half Moon Bay. This shot used three lights. My make up person, Christina Del Ben, had a friend, Maggie Runner, who decided to pose as a 50s bombshell for the shot. Maggie has a great wardrobe, and this yellow number was perfect for the location, an old airstream-style trailer being used as a mini-golf clubhouse. The lighting worked out great, but the background through the trailer door and the window did not. I tried to blow it out, which I did. But I ended up replacing it with a background from nearby Pescadero that I had shot a month or two earlier. I am very happy with the result. This shot ended up with 30 or so layers.

The shot used a grid on the 600B next to the camera on her face. Octobox on 7B strobe camera right. And a snoot on the other 7B strobe to light behind the models head on the left.

Tuesday, March 8, 2011

Josey Baker


I met Josey Baker at Pizzaioli at 6 am for a shoot of him baking bread. When I arrived, Josey was cooling doen the wood fired oven form the night before. He has to get it down to 500 degrees to to bake the bread perfectly. I like getting him in the act. In my favorite photo, at the top, he is tapping the loaf after removing it form the overn. He can hear if it is cooked enough.

I wanted to reflect the morning light so I used my big octobox from the left side. In the top shot, I filled with a hand held PL160 speedlight, just below the camera lens. I like this light. It is soft and dramatic at the same time. A few people suggested I should put a light in the oven to make it look like fire, but there was no fire. Just the radiant heat from the fire the night before.

Saturday, January 29, 2011

The Lucy Billings Album Photos


I had the privilege of working with Lucy Billings to do the photography for her album “No Other Road”. Over three different sessions we worked on various locations, lighting schemes and ideas to create a group of photos that could serve the purposes of the album and be used for publicity. Here are a few with a brief discussion of how they were created.

Before we began shooting, I scouted the area for roads we could shoot on. We were looking for something scenic and somewhat remote, in keeping with the title. The cover shot (at the top of this blog post) and the inside back cover shot were done on Stage Road near Pescadero, CA. This is about a mile from the coast. This photo was taken in the section of road with large eucalyptus trees on both sides. The eventual cover used an illustrated scene with Lucy lifted from the photo. Touraine Bellah at Bellah Design was the creator of this colorful cover. The lighting was natural sunlight. We filled in the shadows with a reflector held by my assistant Sara Kline.

Our second session yielded one of my favorite portraits I have taken. (Above) On a cloudy and windy day, we headed out to the San Francisco Bay under the Dumbarton Bridge between Menlo Park and Newark. There are various dirt roads through this section of the bay that were used by Morton Salt when most of this part of the bay was salt evaporation ponds. There is also an abandoned railway bridge that we used in the background. Lucy braved the cold wind and stood for several photos. I used a coco ring flash and an on camera Canon 580 EX II speedlight. This brightened Lucy up against the background and made the red dress shine. This photo is on the inside flap behind the front cover.

The next shot is on the back of the album. This was taken at the end of the same day we did the bay shot. This shot was done inside at Lucy’s house. I used a Pepper hot light positioned high above and stood on a chair to get the above angle. I like the way the tungsten light warms up the photo and chose not to balance out all the effect of the warm light.

For the publicity shots, we started off at Vida restaurant in Menlo Park, CA. Ali El Safy, the proprietor who had previously posed for my shot The Restaurateur is a big supporter and let us use the restaurant for a backdrop. This shot was taken inside in the front of the restaurant. I used a narrow depth of field to keep the background out of focus. There is one LumiPro LP160 speedlight with an umbrella mounted camera left.

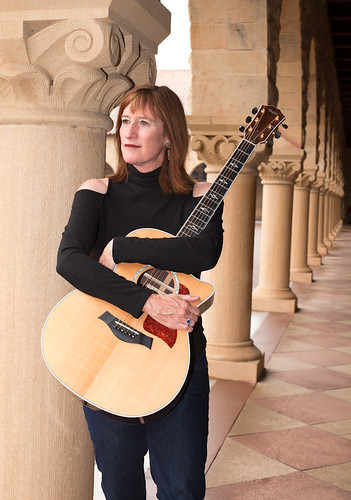
The outdoor shot with the columns was taken at Stanford. We got a strong background with the columns and added a light camera left. Once again we used an LP160 speedlight with an umbrella mounted on a stand.

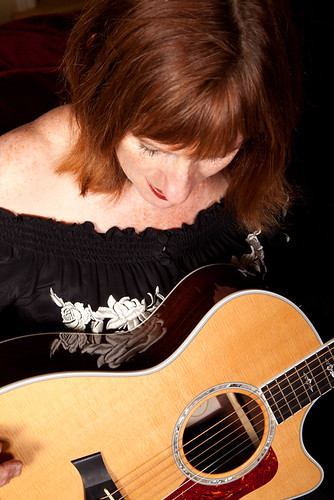
This shot with the guitar and the embroidered blouse turned out to be another favorite. Back at Lucy’s house, we used an Alien Bees AB800 with a softbox to light Lucy’s beautiful red hair and get the great reflection on the guitar.

The fun for me on this project was getting to do so many different types of shots with the same subject. Lucy is very patient and willing to try lots of different ideas to get a good photo. Give her album a listen. You can access it on her website www.beinglucy.com or on iTunes.