Saturday, January 29, 2011

The Lucy Billings Album Photos


I had the privilege of working with Lucy Billings to do the photography for her album “No Other Road”. Over three different sessions we worked on various locations, lighting schemes and ideas to create a group of photos that could serve the purposes of the album and be used for publicity. Here are a few with a brief discussion of how they were created.

Before we began shooting, I scouted the area for roads we could shoot on. We were looking for something scenic and somewhat remote, in keeping with the title. The cover shot (at the top of this blog post) and the inside back cover shot were done on Stage Road near Pescadero, CA. This is about a mile from the coast. This photo was taken in the section of road with large eucalyptus trees on both sides. The eventual cover used an illustrated scene with Lucy lifted from the photo. Touraine Bellah at Bellah Design was the creator of this colorful cover. The lighting was natural sunlight. We filled in the shadows with a reflector held by my assistant Sara Kline.

Our second session yielded one of my favorite portraits I have taken. (Above) On a cloudy and windy day, we headed out to the San Francisco Bay under the Dumbarton Bridge between Menlo Park and Newark. There are various dirt roads through this section of the bay that were used by Morton Salt when most of this part of the bay was salt evaporation ponds. There is also an abandoned railway bridge that we used in the background. Lucy braved the cold wind and stood for several photos. I used a coco ring flash and an on camera Canon 580 EX II speedlight. This brightened Lucy up against the background and made the red dress shine. This photo is on the inside flap behind the front cover.

The next shot is on the back of the album. This was taken at the end of the same day we did the bay shot. This shot was done inside at Lucy’s house. I used a Pepper hot light positioned high above and stood on a chair to get the above angle. I like the way the tungsten light warms up the photo and chose not to balance out all the effect of the warm light.

For the publicity shots, we started off at Vida restaurant in Menlo Park, CA. Ali El Safy, the proprietor who had previously posed for my shot The Restaurateur is a big supporter and let us use the restaurant for a backdrop. This shot was taken inside in the front of the restaurant. I used a narrow depth of field to keep the background out of focus. There is one LumiPro LP160 speedlight with an umbrella mounted camera left.
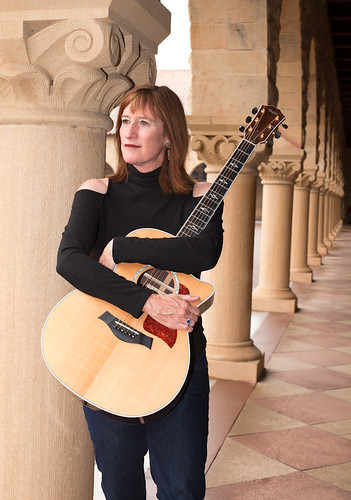
The outdoor shot with the columns was taken at Stanford. We got a strong background with the columns and added a light camera left. Once again we used an LP160 speedlight with an umbrella mounted on a stand.
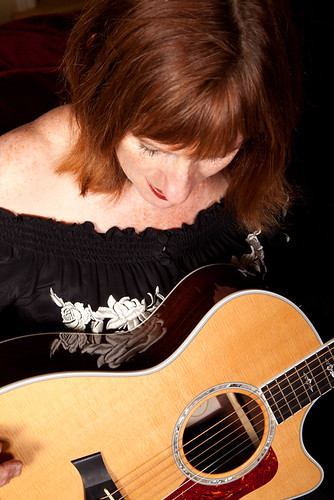
This shot with the guitar and the embroidered blouse turned out to be another favorite. Back at Lucy’s house, we used an Alien Bees AB800 with a softbox to light Lucy’s beautiful red hair and get the great reflection on the guitar.

The fun for me on this project was getting to do so many different types of shots with the same subject. Lucy is very patient and willing to try lots of different ideas to get a good photo. Give her album a listen. You can access it on her website www.beinglucy.com or on iTunes.

Sunday, January 2, 2011

Black and White


I recently converted a bunch of Burning Man portraits from color to Black and White for printing. Originally, I thought these portraits would work best as color, since so many of the folks at Burning Man are literally colorful people. But the power of the Black and White really brought home the impact of the portraits. My professor in Digital Printing, Ryan Farnau, really impressed upon me the fact that a black and white image gives more freedom of interpretation by the artist. Since, by definition, a Back and White is not realistic, then the print can stress the parts of the photo with the greatest impact. In this example, I will go through the steps of one of the more complicated conversions I did. Starting with the color image and going step by step until the final B&W image. Here is the original image. I shot this in natural light. I had a silver canopy tent set up with a white seamless background.
The first thing I did was increase the contrast. the image is a little flat, so i used a high pass filter and dialed the opacity down until I liked it. Then I selected out the subject and filled the enture background with white. This brings out the features of his face and gets rid of that uneven background. The tattoos pop a little more as well. This version is still a little dark so I boost the exposure and brightness.That completes the global adjustments. I would like this to pop more, so I darken the leather in the vest and increase the contrast in the metal "S" shapes. I also boost the contrast in the glasses to make the reflections whiter. Now the conversion to Black and White using the B&W adjustment layer. Now for the final image I darken the tattoos, the wrist bands and the contrast in the hat. Now it pops!Of course, the whole thing took several hours. Selections and adjustments take a long time. Each adjustment gets its own layer in Photoshop, so it is easy to turn them off and on and go back to the original. You can see set of Burning Man portraits on my Flickr page by clicking here. I left some color photos in the set. They still looked better in color.
Friday, December 17, 2010

Night Photography - Part 1 - The gloaming


I really like the term "the gloaming". A friend recently introduced me to it when she saw some of the shots I will cover here. Some photographers call it the magic hour. The time between sunset and dark. There is always a moment when the light falling on your subject and the sky light are equal. This works especially well with artificially lit things like buildings or for flash photographs of people. The photos here were of buildings.

I start at about the time of sunset. In the winter I am setting up a little after 4:30 for 4:50 sunset time. I compose my shot on a tripod and then capture every two or three minutes for up to an hour until the sky is getting no darker. I set a fairly small shutter. f/8 or f/11. Then I make sure the focus is right and set it on manual. The autofocus tends to lose its mind if it gets too dark. I find it best to set the camera to aperture priority starting out and look at the histogram to make sure the shutter speed is capturing all the light and not clipping the shadows or highlights. Occasionally if you have a bright light nearby, you will get a completely clipped light. That is ok. Just make sure you won't get a flair on the lens from a light too close.

I also bracket the shots two stops. Exposing extra light and extra dark in case I want to use HDR on an image. It also is a safety in case I need to switch to the higher exposure later.

At just after sunset 5:01 PM, the shot looked like this.
5:01 PM, f/8, 1/2 sec, ISO 100

Notice how the sky is a little blown out. I expose for the building here. You want the exposure to remain relatively consistent in all the shots. So the shutter speed keeps getting longer as the light fades. In the next shot, 12 minutes later, the sky does not look that much different. We keep having to increase the shutter time to keep the building properly exposed. At this point all the lights are on, but they have not caught up to the ambient yet.
5:14 pm, f/8, 4 seconds, ISO 100

Another 12 minutes later at 5:26, the shutter time is out to 15 seconds. The building is still nicely exposed and the sky is starting to darken.
5:26 pm, f/8, 15 seconds, ISO 100

Now things happen really fast. Since most of the light on the building is artificial, you don't need to increase the shutter time any more to keep it properly exposed. I open up another stop to 30 seconds and get lucky when a plane flies over, leaving a pattern in the sky as it is almost dark. This is the shot I have been waiting for. 5:37 pm, f/8, 30 seconds, ISO 100

I keep shooting until it is almost completely dark. Here is the last shot at 6:46. The same exposure as the winner above. Notice how the building edges barely separate from the sky and now the the artificial lights dominate the shot.
5:46 pm, f/8, 30 seconds, ISO 100

I have put together a video with 8 of these transitions. You can view it by clicking here.

Saturday, December 4, 2010

Self Portraits


I have never really done a whole lot of self-portrait work. I had an assignment where I needed 8 shots. I did not want to do 8 variations on the same shots, so I came up with several ideas. I tried to show different parts of my personality and some of the different roles I play in life. It made me realize how many more I could do. The other big upside about being the model, is that you don't have to worry about the model's time or them wearing out before you do.

The biggest challenge is probably getting the image framed and the focus correct. For focus, I would auto focus on something that I knew was the same distance from the camera as my eyes, then lock it into manual. For framing it was a bit of shoot and chimp (looking at the screen on the camera). It gave me a good appreciation for those doing this on a film camera.

The image above was the first I shot. Pretty conservative, I juiced it up by replacing the blue sky with a cloudy one from another shot and then running a high pass filter and reducing the opaqueness in photoshop. The second shot was on the same day. I decided instead of getting on top of the picnic table, I would get under it. Something unexpected. (Baby steps of daring.) I added the color green to the concrete table and complimentary magenta to the background to create a little tension.

I have always admired the work of Chuck Close, so I decided to do a closeup head shot. (Below) I used a very narrow depth of field, using my 85mm 1.8 lens. I focused on my eyes and wanted as much of the rest out of focus as possible. Light was provided by an alien bees ring flash, the light is so small in my eyes because of the distance from the camera. I ran this through the high pass filter in photoshop to make my imperfections stand out, not too difficult.

The shot below was at the same session as the Chuck Close. I put my glasses back on and put a red filter on the flash, an Alien Bees Ring Flash. Notice how the red filter gets rid of the imperfections. The downward gaze makes this more contemplative.

As I was setting up for a shot I would call the consumer, I was playing around with long exposure and multiple poses. This one was all done in camera. A 4 second exposure. I held for half the shot looking at the camera with my legs crossed. Then, for the second half, I looked out the window and put both feet on the floor. This used a AB800 flash with a softbox, mostly for fill. The key light was camera right from the window.

Below is the one I call The Consumer. It is my favorite. I almost did not submit it. Probably because I was a little embarrassed how much money I have spent on stuff over the years. That pain is probably why it is the most effective shot. For lighting, I used a AB800 with softbox on the camera right. Another AB800 is bounced off the white ceiling to fill the shadows and light the shelf behind. I darkened the lamp in photoshop. (You can see this image bigger by clicking on it, if you really need to see the prices.) The shot after it is the same shot, without the words and with a blue filter on the fill light off the ceiling. It has a totally different feel.
The last two are studio shots with a little more concept. The guitar has always been something I liked but never really mastered. At least I knew enough to make an acceptable chord with my left hand. I had a AB800 with softbox for the main light, camera right. An AB800 above and behind with a red filter. A white poster board behind subject and to camera left to put a little rimlight on my right sleeve.
Last, I did a studio shot with identical lighting to above, except a blue filter on the back light. I call it Cut with The Past. It is meant to symbolize how I am changing my life by switching careers at age 50. I sat on the floor to take the shot of the severed head, using a green filter. I am not totally happy with the result, but it is my first try at doing something like this.

Monday, November 29, 2010

Smiles

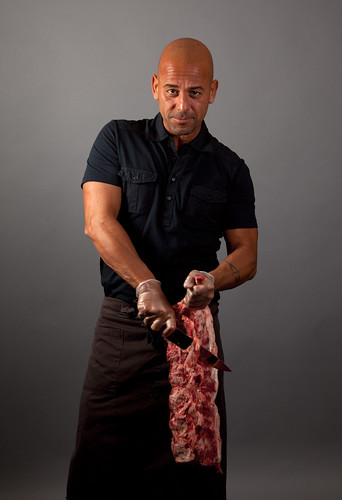
Photographic Portraiture has gotten very serious of late. Many of my favorites show their subjects with blank or serious expressions. I thought it would be instructive to look at a few of the masters of portraiture and how they handle the smile. Before photographs though, Leonardo Da Vinci brought the smile to portraiture with his masterpiece the Mona Lisa. Up until then, portraiture was more lines and exterior without really capturing the spirit of the subject.

Here are some of the masters of modern photographic portraiture and their take.
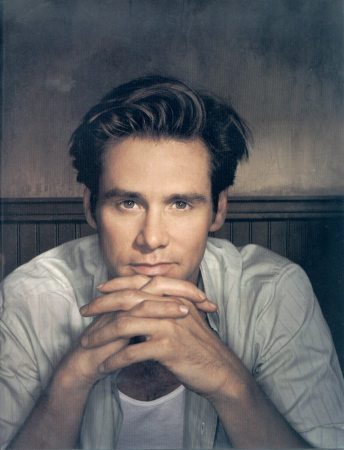
Jim Carrey by Dan Winters

Blythe Danner by Eric Ogden

Juce Law by Annie Leibovitz

Finally, here is one of my own with a smile.
Christina Holmes by Scott R. Kline

Friday, October 15, 2010

Face Paint


For an assignment, I had to do complimentary colors. Only two colors were allowed. I love Cyan and Red together. I decided to combine the assignment with portraiture. With only two colors allowed I needed to exclude eyes, so I spray painted sunglasses. I had a great collaborator in Jodi Carr from ArtyParty who does very sophisticated face painting. The shots were done outside in my daylight studio, which is a canopy tent with white backdrop. Below is a shot with analogous colors.

Monday, August 16, 2010

Outside Lands


I had a great time walking around the Outside Lands Music festival. I decided to focus on shooting people rather than the bands. I haven't done much street photography, so this was a chance to do some with a fairly receptive audience. I asked people if I could take their photos before I shot. that is why most are looking at the camera. These were shot with my 5D Mk II and either an 85mm 1.8 or 50mm 1.8 lens. usually, wide open, to blur out the busy background. No flash was used. See the whole set on my Flickr site.