The tattoo series of portraits has been one of my favorites to execute. Over a period of about 6 weeks, I photographed 16 different subjects. I originally intended to photograph both men and women, but after finding Model Mayhem, a veritable treasure trove of tattooed women who want their photos taken, I decided to focus on women only.
I will focus here on a couple of shots I felt really stood out in the collection. If you would like to see them all, you can see the entire collection on my website at www.scottrklinephoto.com.
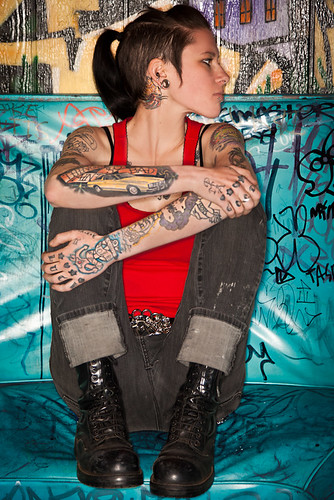
I met Vicci Vice (see photo above) on model mayhem. We met up at her favorite hangout in Oakland, CA. Vicci had some lovely photos on her model mayhem profile, but seeing as this was a portrait, I told her to come as herself. She showed up in some very cool black jeans and a red wife-beater T-shirt. We posed her in a teal Naugahyde booth surrounded by graffiti. This shot featured her gorgeous profile. I used an on-camera 580EXII with a Coco flash ring flash attachment. In the final photo, I pushed the color and made the booth more teal to contrast with the red shirt.
 I actually had two sessions with Roxy Rage. In the first I met her and her boyfriend at a carnival in Oakland. There were several colorful backdrops on the sides of the game trailers. With the 5’10” Roxy walking around in her mini skirt and blue wig, we drew a lot of offers of free games and entertainment from the carnival employees. We ended up with this shot on a blue background, which I felt really complermented her hair. Once again I used the Coco flash 580EXII combo.
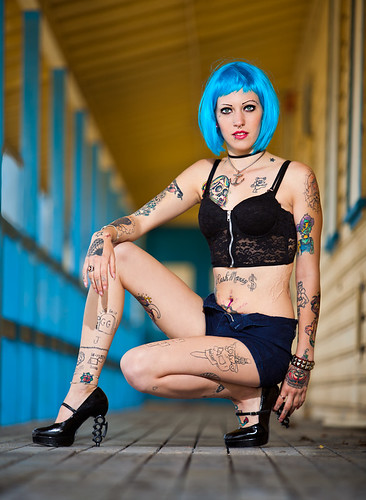 Our second Roxy shot was at Treasure Island in San Francisco. This shot was on the veranda of an abandoned barracks building. The veranda was raised up. I was able to hang a bare speed light above her, using a super clamp on a pipe. It was my only artificial source of light. I then set my camera on a tripod and got back as far as I could using my 70-200mm zoom lens set to 200mm. I tried to get barely above the level of the floor. Roxy did a great job of contorting to show her great legs and those brass-knuckle pumps, while turning to show her upper body and all that great ink.
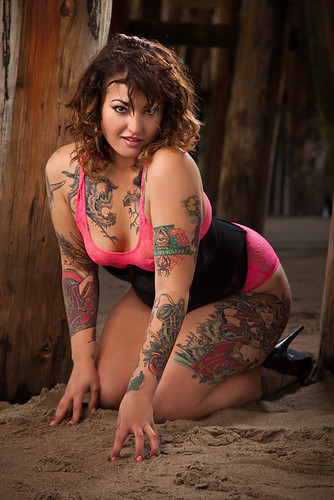 Jayne Doe met me at Santa Cruz boardwalk one Saturday morning. We retreated under the pier where the light was perfect. I added an Alien Bees AB800 light with an Octobox to get this soft light. I also threw a speed light with umbrella from camera right down low to light her legs and another speed light with a mini soft box behind her to put some rim light on her back and hair.
On all these shots, I increase the contrast on the tattoos by using a partially masked high pass filter in Photoshop. Some shots have as many as 12 layers of adjustments.


